Video Studio
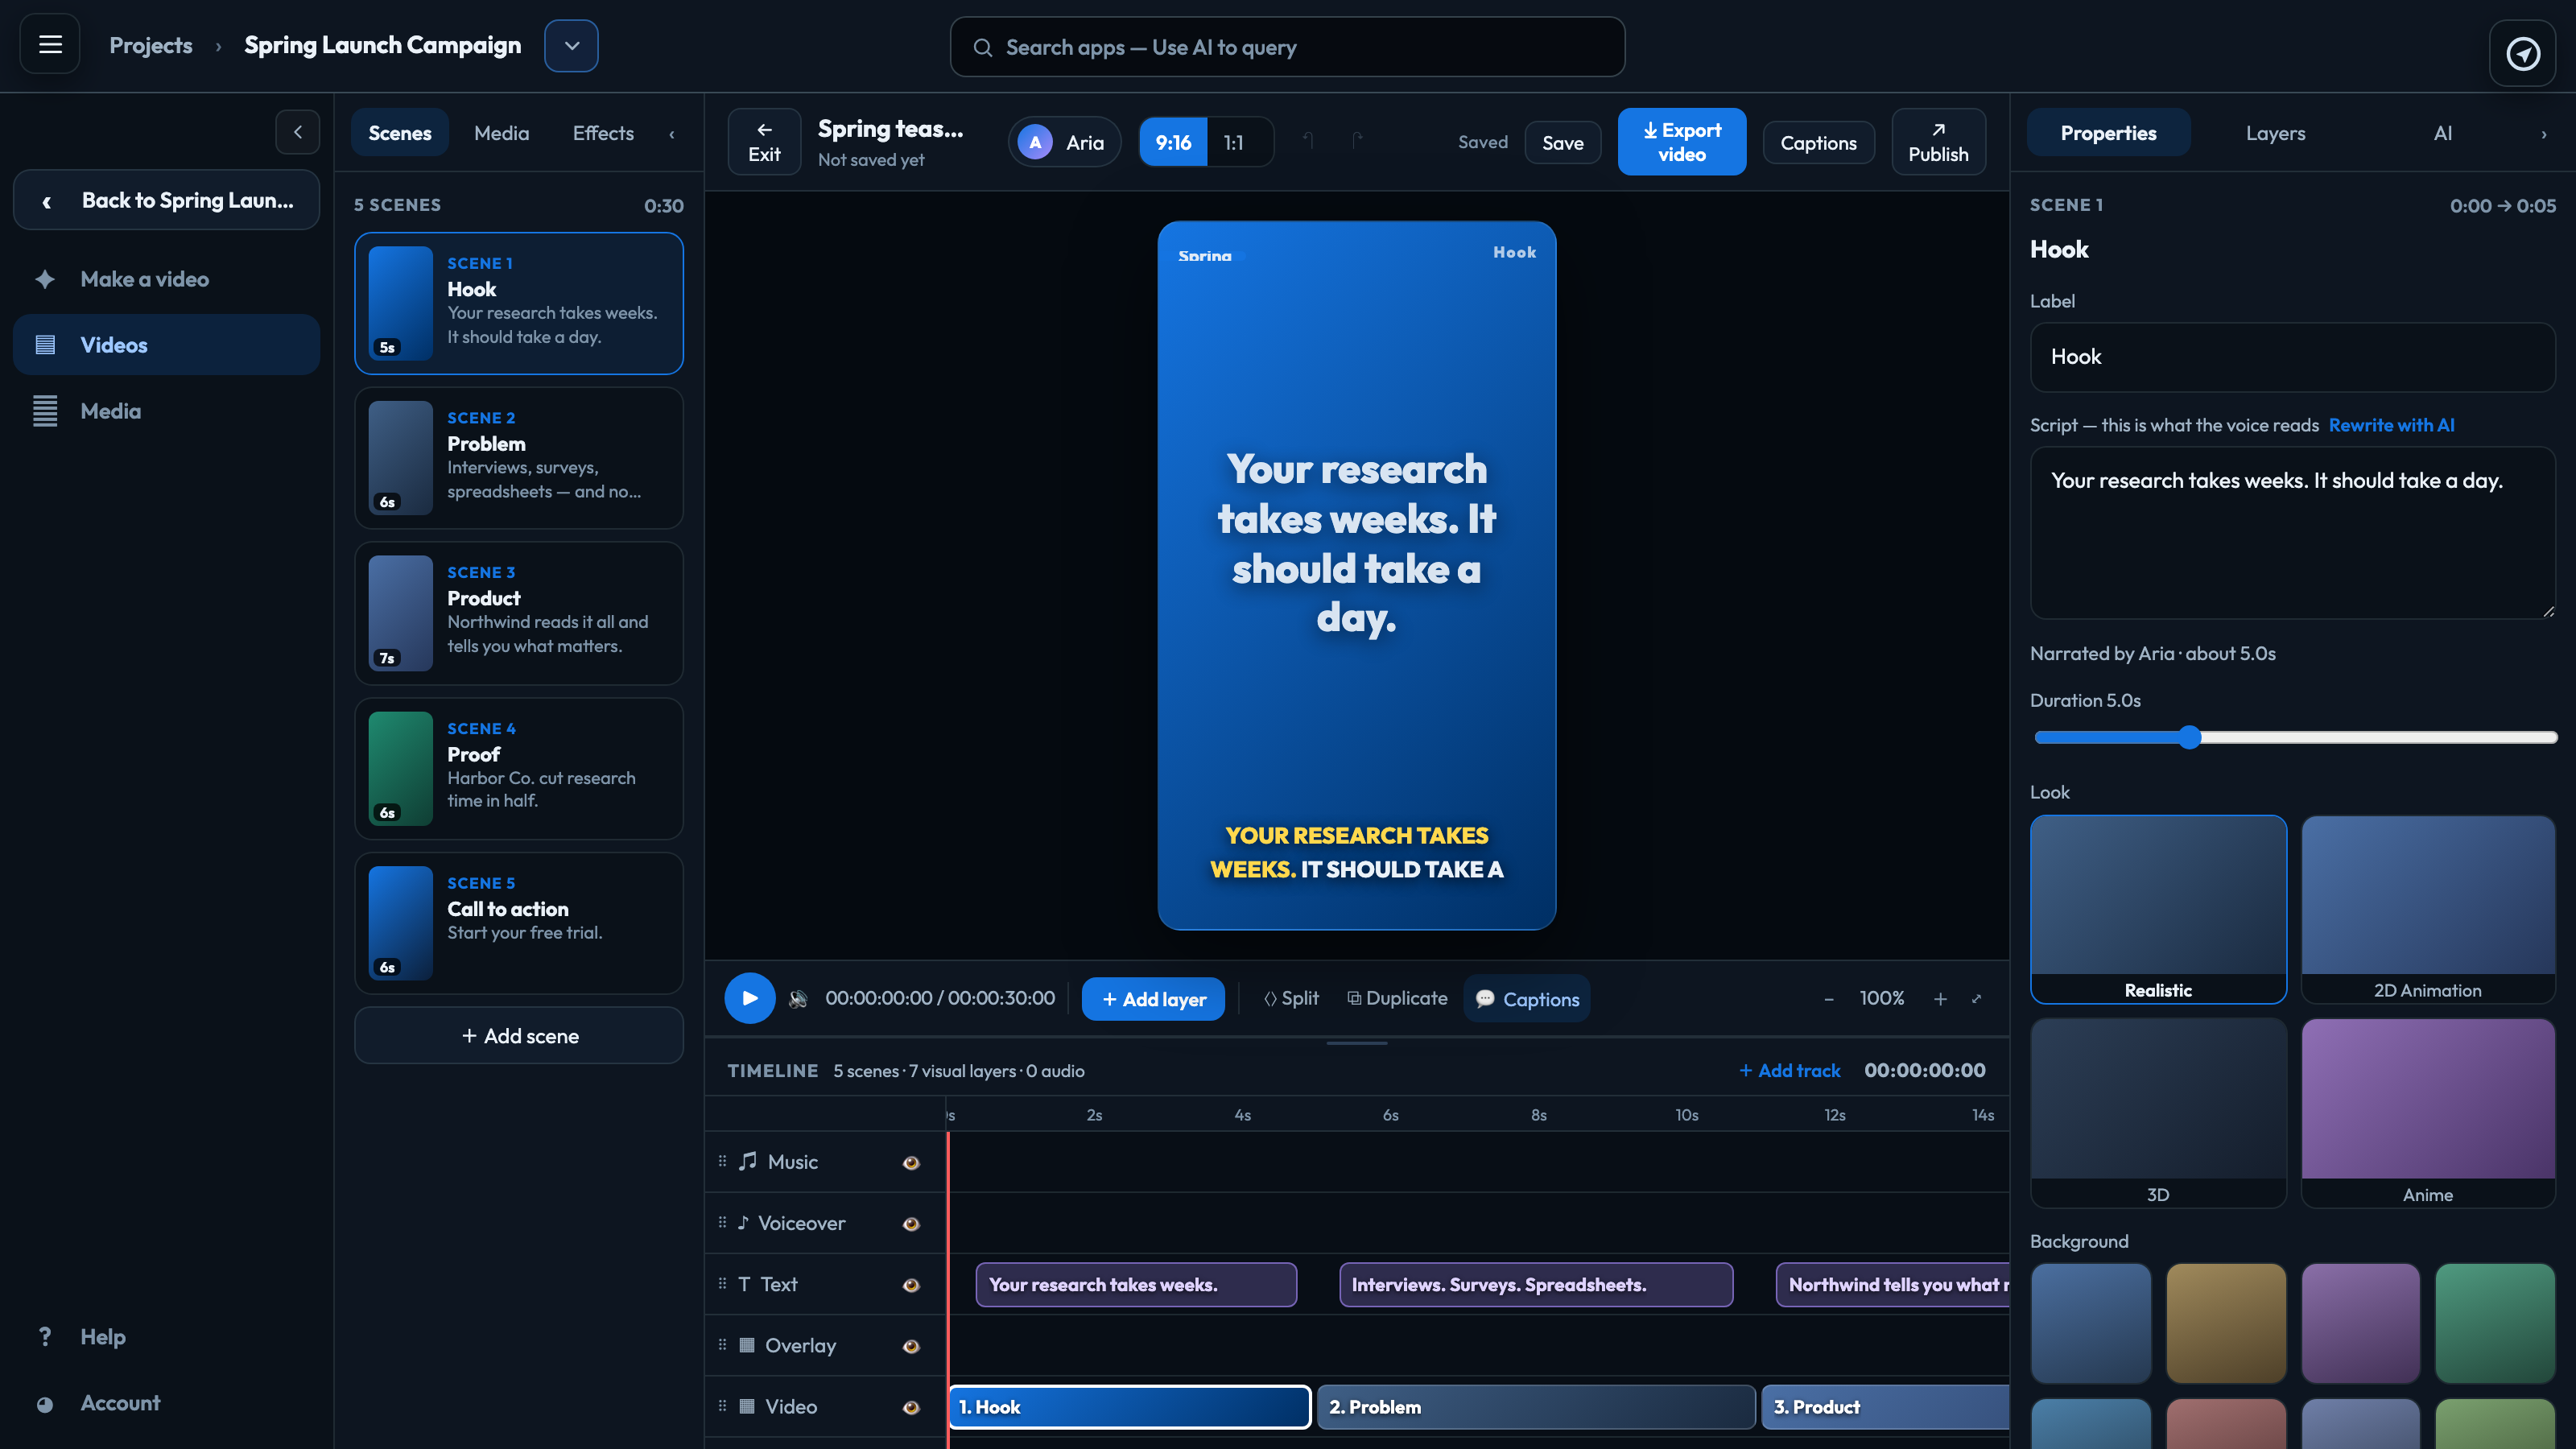
The timeline & tracks
Every layer sits on a track, and the order of the tracks decides what covers what.
To bring it forward, drag its track above the clip — or focus the track’s name and press ↑ or ↓.
Adding to the timeline
- + Add layer asks what you are adding — Text, Image, Clip, Audio or Shape — and puts it at the playhead on a track that suits it.
- Drag a file from Media straight onto a track.
- + Add track adds a Text, Overlay or Audio track.
A clip or a sound is as long as its file, and the video grows to hold it. Two layers never overlap on one track: if the spot is taken, the new layer goes onto another track of the same kind, and a new track is made if there is none free. Sound only goes on audio tracks and pictures only on picture tracks — a drop onto the wrong kind is refused.
Scenes: camera and transitions
Select a scene to set its Camera and Transition in in Properties. The preview shows both as they will be in the exported file, including while you scrub.
| Camera | Push in slowly moves closer over the scene. Pan travels across it. Static holds still. |
|---|---|
| Transition in | How the scene arrives from the one before: Cut, or one of twenty transitions such as Fade, Dissolve, Slide, Wipe left, Circle open, Clock wipe or Whip (all of them). A transition takes half a second (less on a very short scene) and starts where the scene starts. The first scene has nothing to come in from, so it always opens on a cut. |
Apply a transition to every scene sets the same one on them all.
What a scene shows
Over its background, a scene shows its line of narration in the middle, its name in the top-right corner, and your brand badge — the first word of the project’s name on a bar in your Brand Kit colour — in the top-left. With Captions on, the start of the line is shown as a caption, in the video's caption style: by default capitals along the bottom, the first four words highlighted. All of these are in the exported file too.
A video made only of layers has no scenes, and none of these.
Hiding a track
The eye beside a track’s name hides it: an open eye means the track is shown, a struck-through eye means it is hidden. A hidden track is left out of the preview and the export, and so is everything on it:
- Video holds the scenes. Hidden, the scenes’ backgrounds, shots and clips are gone and the frame is black wherever no other layer covers it. The scenes keep their places and lengths.
- Text holds your text layers and each scene’s own line and name. Hidden, none of them is shown.
- Captions have their own switch (💬 Captions) and are not affected by the Text track. The brand badge is not either.
The timeline’s heading says what is hidden (layers, scene pictures, scene text), and a hidden track’s row and everything on it are dimmed. A selected scene or layer that is hidden because of its track says so, with a button to show the track again.
Adding a layer to a hidden track, in any way (+ Add layer, dropping a file on its lane, placing from the Media Browser, or the AI director), shows the track again, and the message says so. So does replacing the picture or clip of a layer on a hidden track, or of a scene. Undo takes the change back and hides the track again.
Ask the AI director
In the editor, open the AI tab on the right and ask for a change in plain words: make the opening punchier, replace scene 3 with a close-up of the product, put the logo in the corner for the whole video, make the voice calmer, use calmer music, slow the music down, put a whoosh on every cut. If a scene or layer is selected, "this" means it.
The director answers with a short list of the edits it would make: a scene's line, length, camera, transition or what it shows; scenes added, removed or moved; text, pictures and clips added, moved or removed; captions on or off; how the voice is delivered; the music (a track from the library, its level, how far it drops under the voice, its speed, or none) and sound effects (one on every cut, or one at a moment). Music made with AI is made from the Library tab, where its price is shown. Nothing changes yet. Anything it could not do is listed under Left out.
- Apply makes all the edits at once. Undo takes them all back in one step.
- Discard leaves the video as it is.
When the change needs new footage, the director also proposes filming a new AI shot for the scene, with its price. Apply and film makes the edits and starts the shots, charged only for shots that are made; Apply the edits only makes the edits without filming anything. Shots take a few minutes and land under their scenes. Undo takes back the edits; a shot already started still finishes and appears in Media.
If the video is changed after the director answers, its suggestion is not applied: ask again and it starts from the video as it is now. Asking the director uses a little AI credit, like writing a script. Making changes in the editor needs the Publisher role or above.
Signed in to VeraGen? Press Guide me on any screen for a walkthrough, or ask Odin.