Agentic Workflows
Building a workflow
By hand
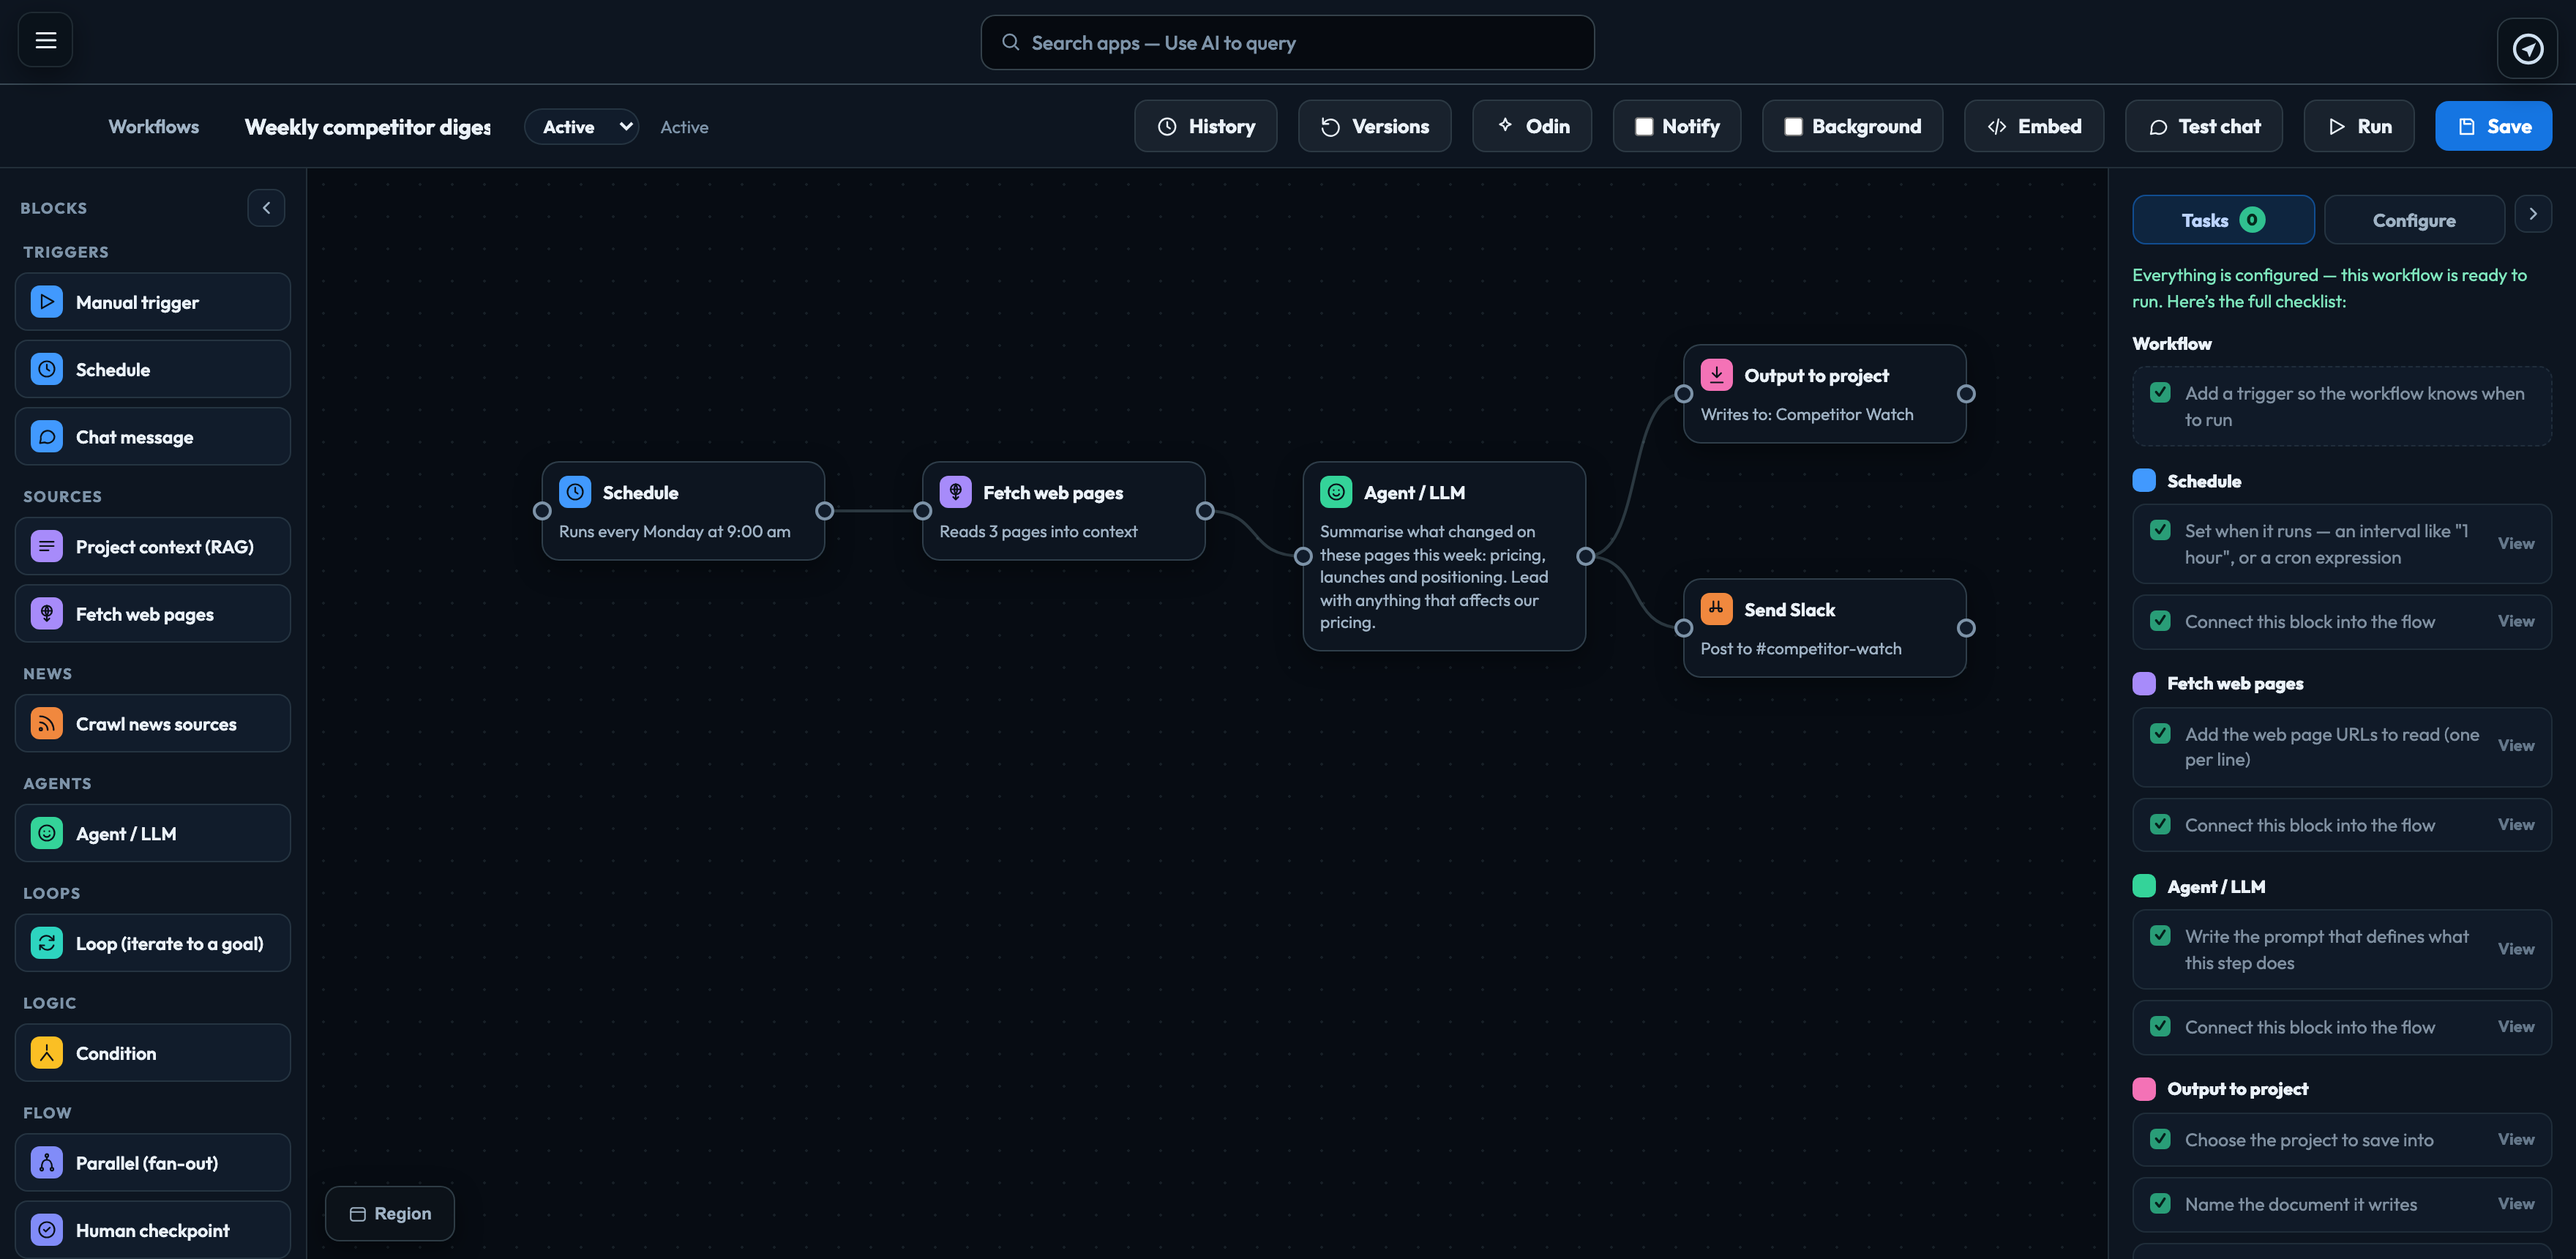
- Click a block in the Blocks list on the left to add it to the canvas.
- Drag from a block's right dot to another block's left dot to connect them.
- Click a block to set it up in the Configure tab on the right.
- Name the workflow at the top and click Save, or press Cmd/Ctrl-S.
In a prompt, message or document name, {{result}} is the previous step's answer and {{date}} is today's date.
With Odin
Click Odin in the top bar and describe what you want: "summarise a project's documents every Monday and email me a brief". Odin builds the blocks on the canvas and lists what it made.
Odin replaces the blocks on the canvas with the ones it builds. Regions you drew stay, unless Odin draws its own. Nothing is saved until you click Save.
Tasks and Configure
The panel on the right has two tabs.
| Tasks | A checklist of what the workflow still needs — a trigger, each block's required settings, and any block not yet connected. The number on the tab is how many are left. Click an item to jump to its block. |
|---|---|
| Configure | The settings of the block you selected. |
When the count reaches zero the panel says the workflow is ready to run.
Regions: notes on the canvas
Region at the bottom-left of the canvas draws a labelled, coloured frame behind a group of blocks.
- Click Region, then drag out a rectangle (or click once for a default size).
- Double-click the region to write its title and note.
- Drag it to move it. With it selected, pick a colour or click the bin beside Region to delete it.
How a block has been running
Each block and region has a small chart icon. Click it to see, for the last 30 days, how often it worked, how long it usually takes, what it costs each time and its last problem.
Signed in to VeraGen? Press Guide me on any screen for a walkthrough, or ask Odin.